Designing Trendy Planner Stickers with Procreate Brush Templates
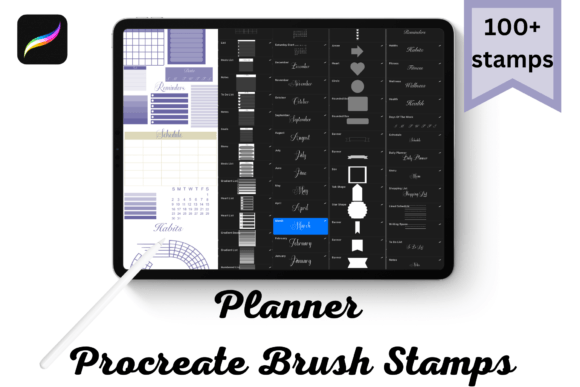
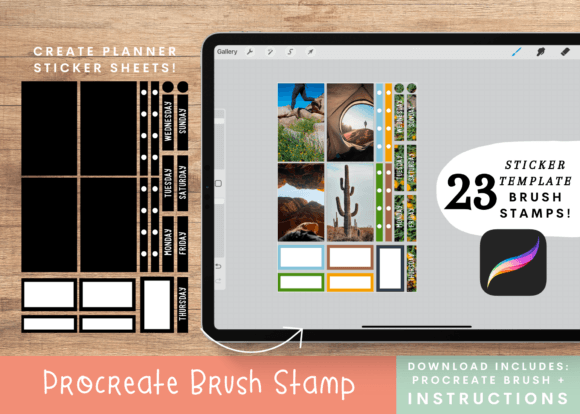
The world of digital planning has exploded in recent years, transforming from a niche hobby into a vibrant creative industry. At the heart of this movement is the desire for personalization. While pre-made sticker sheets are convenient, they often lack the unique touch that defines a personalized planner. This is where the Planner Sticker Procreate Brush set becomes an invaluable tool for creators. By leveraging a specific set of 23 abstract brush stamps, artists and hobbyists alike can bypass the tedious process of drawing every outline from scratch, allowing them to focus on color, pattern, and composition.
Creating trendy planner stickers directly within Procreate offers a seamless workflow that bridges the gap between digital art and tangible organization. Whether you intend to cut your creations by hand or utilize cutting machines like Cricut or Silhouette, understanding how to properly utilize template stamp brushes can significantly elevate the quality and efficiency of your output. This guide explores the practical application of these tools, focusing on the technical setup and creative possibilities inherent in this modern design approach.
The Efficiency of Stamp Brushes in Digital Design
One of the most common hurdles for new digital artists is the time commitment required to create consistent shapes. Drawing perfect circles, irregular blobs, or complex abstract frames repeatedly can lead to fatigue and inconsistency. A dedicated Planner Sticker Procreate Brush set solves this by providing pre-designed templates. These are not just simple shapes; they are engineered specifically to work with Procreate’s layering capabilities.
The set includes 23 abstract brush stamps, each designed to serve as a foundational structure for your stickers. These abstract forms are particularly trendy in current stationery aesthetics, moving away from rigid geometric perfection toward organic, hand-drawn feels. By using these stamps, you ensure that every sticker in your sheet maintains a cohesive style while allowing for infinite variation in color and internal design. This consistency is crucial when building a brand or creating a themed planner kit.
Setting Up Your Canvas for Print-Ready Results
Before diving into the creative process, proper canvas setup is essential. Many beginners make the mistake of designing on standard screen-resolution canvases, which results in pixelated prints. To achieve professional-quality printable stickers, you must start with the right dimensions and resolution. The recommended canvas size for this workflow is 4.5 x 6.75 inches. This dimension is ideal for creating half-letter sized sticker sheets, which are easy to handle, store, and print on standard home printers.
Ensure your DPI (dots per inch) is set to at least 300. This high resolution guarantees that when your digital creation is printed, the edges remain crisp and the colors stay vibrant. Once your canvas is ready, the next step involves managing your layers effectively, which is the core mechanic behind using these template brushes.
Mastering the Clipping Mask Workflow
The true power of this Planner Sticker Procreate Brush system lies in its interaction with the clipping mask feature. This technique allows you to fill your sticker shapes with patterns, textures, or gradients without ever going outside the lines. It is a non-destructive editing method, meaning you can change your mind about colors or patterns at any time without erasing and redrawing.
To begin, navigate to the layers pane and turn off the background color. This creates a transparent background, which is vital for printing stickers since you do not want a white box around your designs unless specifically intended. Next, add a second layer above the background. This will be your base layer for the sticker shape.
Select your desired template brush from the set of 23 abstract options. Stamp the brush onto the canvas in white. Why white? Because this white shape will serve as the boundary for your clipping mask. After stamping, you can fill in the gaps or solidify the shape using the color fill tool or a standard brush. This white layer acts as the "container" for your design.
Adding Definition and Pattern
Once your white base is established, create a new layer directly above it. On this new layer, stamp the exact same brush in black. This black outline provides the necessary contrast and definition, giving your sticker that classic, hand-drawn look. It ensures that even if you use light pastel colors inside the sticker, the shape remains distinct and visible.
Now comes the creative part. Add another new layer above the black outline layer. Tap on this layer and select Clipping Mask. You will see an arrow appear, indicating that anything you draw on this layer will only be visible where it overlaps with the layer below it. Here, you can stamp patterns, paint watercolor textures, or insert digital paper designs. The beauty of this method is that you can experiment with dozens of different patterns for the same sticker shape without altering the original outline.
From Digital File to Physical Sticker
Designing is only half the journey; the ultimate goal is often a physical product. The files created using this Planner Sticker Procreate Brush workflow are versatile enough for various production methods. For those who enjoy the tactile experience of crafting, printing these sheets on high-quality sticker paper and cutting them by hand is a satisfying option. The abstract nature of the 23 brush stamps means that slight imperfections in hand-cutting can actually enhance the organic aesthetic of the stickers.
However, for those looking to scale their production or achieve precision, electronic cutting machines like Cricut or Silhouette are ideal. When preparing your file for these machines, the transparent background you created earlier becomes crucial. Most cutting software can detect the contrast between the black outlines and the transparent background, allowing for automatic trace and cut features. This saves hours of manual weeding and cutting time.
It is important to note that while the digital file is ready for print, the physical material you choose affects the final result. Matte sticker paper offers a sophisticated, non-reflective finish that works well with handwritten notes, while glossy paper makes colors pop and is more resistant to water and wear. Consider your end-user’s preferences when selecting your printing materials.
Commercial Use and Creative Freedom
For aspiring entrepreneurs, the inclusion of Commercial Use rights in this brush set is a significant advantage. It allows designers to create sticker packs, digital planner inserts, or physical products to sell on platforms like Etsy, Shopify, or at local craft fairs. This removes the legal ambiguity often associated with using third-party assets and empowers creators to monetize their skills confidently.
When creating products for commercial sale, consistency and branding are key. Using the same set of 23 abstract brushes across different product lines helps establish a recognizable style. Customers often return to sellers whose aesthetic they trust and recognize. By mastering these specific tools, you can develop a signature look that sets your shop apart from competitors who may rely on generic clipart.
Practical Tips for Best Results
- Experiment with Opacity: Don’t be afraid to lower the opacity of your pattern layers. Subtle textures often look more professional than bold, overwhelming prints.
- Color Harmony: Use Procreate’s color harmony tools to ensure your palette is cohesive. Trendy planner stickers often feature muted earth tones, pastels, or monochromatic schemes.
- Layer Organization: Name your layers clearly (e.g., "Base White," "Outline Black," "Pattern Clip"). This keeps your workflow organized, especially when working on complex sheets with multiple stickers.
- Test Prints: Always print a test sheet on regular paper before using expensive sticker paper. Check for color accuracy and size proportions.
Incorporating a Planner Sticker Procreate Brush set into your digital art toolkit streamlines the creation process without sacrificing creativity. It allows you to produce high-quality, trendy, and professional-looking stickers efficiently. Whether you are designing for personal use or building a small business, understanding the technical nuances of clipping masks, canvas setup, and print preparation will ensure your final products stand out in the crowded world of planner accessories. Embrace the flexibility of digital design, and let these 23 abstract templates serve as the foundation for your next creative project.