Mastering Digital Inking: A Practical Guide to Procreate Brush Pens
Digital illustration has democratized art, allowing anyone with an iPad to create professional-grade work. However, the transition from traditional media to digital tools often hits a snag when artists try to replicate the tactile feel of ink on paper. This is where Procreate Brush Pens become essential. They are not just generic digital tools; they are specialized assets designed to mimic the friction, flow, and texture of physical ballpoint pens. For creators ranging from hobbyists to professional illustrators, understanding how to leverage these tools correctly can mean the difference between flat, lifeless sketches and dynamic, textured artwork.
Many users download brush sets expecting immediate mastery, only to find their lines look jagged or unnatural. This frustration usually stems from a misunderstanding of how digital brushes interact with hardware and software settings. By addressing common pitfalls early, you can streamline your workflow and achieve the authentic hand-drawn aesthetic you are looking for.
The Hardware Misconception: Why Your Stylus Matters
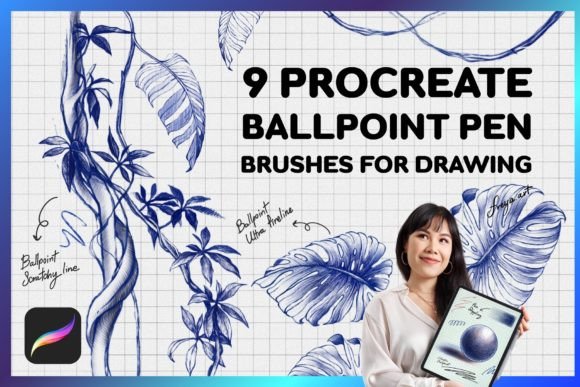
One of the most frequent mistakes beginners make is attempting to use pressure-sensitive brushes with incompatible hardware. The set of 9 Procreate Ballpoint Pen Brushes relies heavily on tilt and pressure data to function correctly. If you are using a capacitive stylus or your finger, you will miss out on the core functionality of tools like the Ballpoint Ultra Fine Liner or the Pen Shading Left and Right Brush.
These brushes are engineered to respond to the subtle nuances of the Apple Pencil. When you press harder, the line thickens; when you lighten your touch, it fades, mimicking the ink flow of a real ballpoint. Without this hardware synergy, the Classic Ballpoint Brush may appear uniform and robotic. Before purchasing or downloading any high-fidelity brush set, verify that your setup supports pressure sensitivity. This simple check prevents wasted time and ensures you get the value promised by the tool’s design.
Software Compatibility: Avoiding the Photoshop Trap
A critical detail often overlooked by new digital artists is file compatibility. It is vital to understand that Procreate brushes are made for the Procreate app for iPad and do not work in other software like Adobe Photoshop, Clip Studio Paint, or Procreate Pocket on iPhone (unless specifically converted). Many users purchase brush packs assuming they are universal vector files or standard image overlays, leading to immediate disappointment.
This limitation exists because Procreate uses a proprietary brush engine that handles dynamics, grain, and shape sources differently than desktop software. To avoid this error, always check the file extension before buying. You should be looking for .brushset or .brush files. If you are a multi-platform artist, ensure you have separate assets for each program. Recognizing this boundary helps manage expectations and ensures you are working within the right ecosystem for these specific tools.
Choosing the Right Tool for the Task
With nine distinct brushes in this set, another common error is "tool paralysis" or using the wrong brush for the wrong job. Each brush serves a specific purpose in the rendering pipeline. For instance, using the Pen Stippling Brush for long, sweeping contour lines will result in a disjointed, dotted mess rather than a smooth curve. Conversely, trying to create soft shadows with the Ballpoint Scratchy Line Brush will yield harsh, unintended textures.
Here is a practical breakdown of how to apply these tools effectively:
- Line Art: Use the Ballpoint Ultra Fine Liner for crisp outlines and technical details. Its stability makes it ideal for architectural sketches or precise character designs.
- Texture and Grit: The Ballpoint Scratchy Line Brush and Pen Scumbling Brush are perfect for adding organic imperfections. Use them sparingly to break up clean lines and add a hand-drawn feel.
- Shading and Volume: The Pen Hatching and Pen Patch Hatching brushes are designed for building tone through cross-hatching. Do not try to blend them like airbrushes; instead, layer them to create depth.
- Directional Flow: The Pen Contouring Left and Right Brush is specialized for following the form of an object. Using this incorrectly—such as hatching against the form—can flatten your image rather than give it volume.
By matching the tool to the intent, you reduce the need for excessive editing later. This efficiency is crucial for freelancers and entrepreneurs who need to maintain a steady output without sacrificing quality.
The Role of Textures in Digital Realism
Digital art often suffers from being "too clean." The inclusion of bonus textures—Paper, Grid, and Line—addresses this issue directly. A common mistake is ignoring these assets or applying them at full opacity, which can overwhelm the artwork. These textures are meant to be subtle foundations, not dominant features.
To use them effectively, place the Paper Texture on a separate layer beneath your drawing and lower the opacity to around 10–20%. This adds a tooth to the canvas, making the Classic Ballpoint Brush react more realistically as if it were dragging across real paper. The Grid Texture is invaluable for technical drawings or comic layouts, providing structure without the need for manual ruler work. Understanding how to layer these textures enhances the perceived quality of your work, making it stand out in portfolios and social media feeds.
Workflow Efficiency and Instant Access
For busy creators, time is a commodity. One advantage of this digital product is the Instant Download feature. However, users often fail to organize their libraries immediately after downloading. Dumping all nine brushes into your main gallery can clutter your interface and slow down your selection process.
A better approach is to create a dedicated brush group named "Ballpoint Set" within Procreate. Import the .brushset file directly into this group. This keeps your workspace tidy and allows you to toggle the entire set on or off as needed. Additionally, utilize the included Color Swatch to pre-load a palette that complements the ink-style aesthetic. Having your colors and tools organized before you start drawing reduces friction and helps maintain creative flow.
Evaluating Quality Before You Commit
When considering any digital asset, look beyond the marketing images. Check for user reviews that mention ease of use and compatibility. Since this set includes specialized tools like the Pen Shading Left and Right Brush, ensure that the creator provides documentation or tutorials on how to use directional brushes. Good support indicates a higher quality product.
Furthermore, test the brushes on different canvas sizes. Some brushes behave differently on high-resolution canvases versus smaller sketches. If a brush appears pixelated or too faint, adjust the size limits in the brush settings. Most Procreate brushes allow for customization, so do not be afraid to tweak the pressure curve to suit your personal drawing style.
In conclusion, mastering Procreate Brush Pens requires more than just installation; it demands an understanding of hardware capabilities, software limitations, and artistic application. By avoiding common pitfalls such as using incompatible styluses, ignoring texture layers, or mismatching tools to tasks, you can unlock the full potential of this set. Whether you are sketching concepts for a client or creating personal art, these tools offer a bridge between the traditional and digital worlds, provided they are used with intention and knowledge.